Category Archives: Development

Jetboard Joust Devlog #7 – Control, Camera, Action!

This has been a bit of a tidying up session – sorting out a few things that had been niggling at me.

Firstly – the controls. The directional control work I’ve been doing on ‘Attack Of Giant Jumping Man’ made me rethink how I’m going to approach the control system somewhat. I thought I’d trying bolting on some of the experimental ‘touch controllers’ I did and see how they played as I’d really like to get a left, right, thrust and fire in there if possible.

The ‘elastic’ control system seemed to work pretty good so I’ve modified this a bit and this is what I think I’m going to go with. Basically it’s a two-handed control system with two buttons on the right for thrust and fire and a directional control on the left. On the directional control a drag left or right orientates the player and accelerates whilst held whereas a long touch with no movement simply accelerates in the direction the player is currently facing.

On the right the ‘collision’ area for the buttons takes up the entire right hand side of the screen divided as per the illustration. This makes it really easy to hit either button and the control system seems to work really well, at least for the moment.

Next up – camera. I misjudged what a pain in the arse this was going to be. previously in 2D scrolling games I’ve done very simple camera tracking whereby the screen simply scrolls at a fixed rate whenever the player leaves a certain area and enters a ‘buffer zone’ towards the edges of the screen. Occasionally I’d get a bit more fancy and scroll to position the player so they gain a longer ‘lookahead’ depending on what direction they were facing.

A fixed camera rate looked crap in this game because the movement was very fast and there were too many abrupt stops or changes in direction which became very jarring to look at. I’ve added a certain amount of acceleration and decceleration to the way the camera moves to make the motion smoother. What was hard was to get the motion smooth whilst keeping up with the pace at which the player will move and change direction. I think it’s pretty much there now but no doubt I will have to go back and rethink certain aspects yet again.

Lastly – collision detection. One scenario was bugging me whereby if you accelerated into the side of a floating block, then continued to accelerate whilst dropping, the board would fly off from beneath you when it dropped below the edge of the block. Whilst technically ‘correct’ this just felt too harsh in practice. Despite this, I still wanted the player to be knocked off if an attempt is made to fly beneath a floating block and the player clips the block but the board doesn’t.

These two scenarios are the same as far as the collision detection algorithms are concerned and it’s pretty hard to differentiate between them. What I’ve done as a compromise is only have the player knocked off in this scenario if the board is travelling at a certain velocity. So far this seems to do the trick!

Dev Time: 0.5 days
Total Dev Time: approx 10 days

previous | next

mockup_3x
Screen Division For Touchscreen Controls


Trying To Get A Smooth Tracking Camera


This No Longer Sends You Flying…


…Whereas This Still Does!

Jetboard Joust Devlog #4 – Enemies and Explosions

When I code I have a tendency to ‘potter’ – that is, I’ll start off with the aim of doing something and end up getting distracted by various side-tasks along the way. Much as one might do when gardening!

So in this case I started off trying to get my first simple enemy done and ended up getting sidetracked into writing a particle generator to handle explosions and other FX in the game.

Consequently my initial enemy is still looking pretty crappy. I’m not happy with it at all actually. God this pixel art stuff is harder than it looks! All I wanted was a simple spinning ‘mine’ type thing that will remain largely static as a dumb target. The first attempt was OK but somehow looked wrong compared to the main character – like I was using too many colours or something, not contrasty enough. So I tried again giving it two ‘eyes’ this time and adding another frame to the animation. Still looks crap and now the animation looks all wrong too, like it’s not really spinning correctly. I know – even with four years at art school I should stick to code!

Anyway, in order to feel as if I was making some progress I decided one of these would do as a placeholder and moved on to implementing a simple ‘enemy’ base class and some basic collision detection for when the board is ‘fired’. Easy.

Next I needed explosions, and as this game is partly ‘Defender’ inspired it seemed some kind of particle-based explosion would be the way to go. I’ve never written a particle generator before so have no idea whether I’m going about this the best way (maybe I should have read up about it first) but am pretty pleased with where I’ve got to so far.

A ‘generator’ is instantiated with a max number of particles and a lifespan and chucks out max_particles/lifespan particles per frame.

Each particle has a velocity, decceleration and lifespan (defined at the generator level), each with a defined amount of variance. there’s also the option to set up a tween on the opacity of each particle. I calculate the tween values in advance.

So not much is being done per particle per frame other than calculate the new velocity and draw it. Thinking about it I could probably calculate the velocities in advance as well if I really needed to but not if I add additional factors like gravity which I plan to do. It should prove a very useful class throughout the game.

Another thing I’ve been a bit stuck on is getting the ‘camera’ on the scrolling world to perform to my satisfaction. Still not there on that one yet, hopefully have it resolved by the next installment!

Dev Time: 1 day
Total Dev Time: approx 7 days

previous

mockup_3x
‘Mine’ Type Enemy Attempt – Rubbish

mockup_3x
Tried Again – Still Hopeless!

mockup_3x
First Draft Particle Explosions – Look Like Fun?

Updating Legacy MonoGame Projects to iOS9 / Unified API

Just the moment you long for. Apple releases a new iOS update and that breaks something in your development platform of choice (Xamarin/MonoGame in my case) and all your apps no longer work. Great. Like I didn’t have enough to do.

And as with everything Apple nowadays – any kind of update seems to break everything else thereby creating a domino effect of pain and tedium as you wait for gigabytes of data to download over a shitty rural broadband connection. Oh, the joy!

So, without further ado here’s how to update your legacy MonoGame projects to iOS9 and the Unified API. Hopefully this will make life a little easier for someone.

If you have a crappy broadband connection buy a copy of ‘War And Peace’ or something suitable to keep you occupied.

If you’re running an OS earlier than Yosemite update to El Capitan. You’re going to have to unfortunately. You’ll need XCode 7 and that only runs on Yosemite or later. Apple aren’t big on backwards-compatibility these days.

Update to XCode 7.

Update everything Xamarin-related to the latest version. I’m currently running Xamarin Studio 5.10 which at the time of writing is on the alpha update channel. I was getting some issues with creating archives using the current ‘stable’ release.

Update any additional components you are using to the latest version – for example I was using the Xamarin Google AdMob component. Make sure to add the ‘unified’ version.

Open the solution you are updating and try to build it – you may get the following error:

/Library/Frameworks/Mono.framework/External/xbuild/Xamarin/iOS/Xamarin.iOS.Common.targets: Error: Error executing task DetectSdkLocations: Unknown TargetFrameworkIdentifier: .NETFramework

Remove the references to monotouch and OpenTK from your project and instead add references to OpenTK-1.0.dll and Xamarin.iOS.dll (these are visible under the ‘all’ tab when you go to edit references).

Try and build the project again. You will probably get a shedload of errors to do with it not being able to find the MonoTouch namespace. Just get rid of all references to MonoTouch, ie replace ‘using MonoTouch.Foundation;’ with ‘using Foundation;’ or ‘using MonoTouch.UIKit;’ with ‘using UIKit;’ etc.

Depending on how many of the native classes you referenced you may have some additional work to do here, probably involving changing ‘float’ references to ‘nfloat’. Hopefully you’re not referencing too many of these as the whole point of MonoGame is that we avoid the native classes if possible (I just had to change some of my ad-serving code).

Hopefully your code should now compile and the only remaining errors (if any) are due to an outdated MonoGame, for example:

Error CS0012: The type `MonoTouch.UIKit.UIImage’ is defined in an assembly that is not referenced. Consider adding a reference to assembly `monotouch, Version=0.0.0.0, Culture=neutral, PublicKeyToken=84e04ff9cfb79065′ (CS0012)

Download and build the latest version of MonoGame from the Develop branch on GitHub. At the time of writing there are issues with the latest ‘stable’ build of MonoGame (3.4) with iOS9 so you will need the version from the Develop branch. Change all the MonoGame references in your project to the latest versions.

Hopefully you should now get an error free compile, however you may get something like the following:

Error MT0073: The minimum deployment target for iOS is 5.1.1 (current deployment target is 4.2). Please select a newer deployment target in your project’s Info.plist. (MT0073)

To resolve this simply change the deployment target of your iOS project to 5.2 (note: this setting is now in the info.plist file).

Try and compile again. Most likely you will now get the following errors:

Error MT0016: The option ‘–nomanifest’ has been deprecated. (MT0016)

Error MT0016: The option ‘–nosign’ has been deprecated. (MT0016)

To resolve this your .csproj file needs to be changed so that it’s building using the ‘unified’ settings. Bit of voodoo required here as you will have to quit Xamarin and edit the .csproj file for your iOS project using your text editor of choice. Follow the instructions in step one of the ‘Steps To Update Manually’ section here. In short:

Change the project flavor in your csproj files from ‘6BC8ED88-2882-458C-8E55-DFD12B67127B’ to ‘FEACFBD2-3405-455C-9665-78FE426C6842’. Edit the csproj file in a text editor and replace the first item in the <ProjectTypeGuids> element.

Change the Import element that contains ‘Xamarin.MonoTouch.CSharp.targets’ to ‘Xamarin.iOS.CSharp.targets’.

You should now, finally, be able to compile and run your project on a connected iOS device. If, on launch, you get the following error:

System.EntryPointNotFoundException: alcMacOSXMixerOutputRate
at at (wrapper managed-to-native) Microsoft.Xna.Framework.Audio.OpenALSoundController:alcMacOSXMixerOutputRate (double)
at at Microsoft.Xna.Framework.Audio.OpenALSoundController.OpenSoundController () in <filename unknown>:line 0
at at Microsoft.Xna.Framework.Audio.OpenALSoundController..ctor () in <filename unknown>:line 0
at at Microsoft.Xna.Framework.Audio.OpenALSoundController.get_GetInstance () in <filename unknown>:line 0
at at Microsoft.Xna.Framework.iOSGamePlatform..ctor (Microsoft.Xna.Framework.Game game) in <filename unknown>:line 0
at at Microsoft.Xna.Framework.GamePlatform.Create (Microsoft.Xna.Framework.Game game) in <filename unknown>:line 0
at at Microsoft.Xna.Framework.Game..ctor () in <filename unknown>:line 0

You are not running the latest MonoGame build from the Develop branch as described earlier. Unfortunately MonoGame 3.4 and earlier exhibit this problem with iOS9. Update all the MonoGame references in your project to the latest version from the Develop branch on GitHub.

If you’ve made it this far without losing the will to live your app should be running on iOS9. I’m afraid to say your problems aren’t over though. Once you have built your updated app and try and upload to iTunesConnect using the Application Loader you will more than likely run into the following errors:

ERROR ITMS-90086: “Missing 64-bit support. Beginning on February 1, 2015 new iOS apps submitted to the App Store must include 64-bit support and be built with the iOS 8 SDK. Beginning June 1, 2015 app updates will also need to follow the same requirements. To enable 64-bit in your project, we recommend using the default Xcode build setting of “Standard architectures” to build a single binary with both 32-bit and 64-bit code.”

To fix this under Project Options->Build->iOS Build->Supported Architectures select ‘ARMv7+ARMv7s+ARM64’

ERROR ITMS-90474: “Invalid Bundle. iPad Multitasking support requires these orientations: ‘UIInterfaceOrientationPortrait,UIInterfaceOrientationPortraitUpsideDown,UIInterfaceOrientationLandscapeLeft,UIInterfaceOrientationLandscapeRight’. Found ‘UIInterfaceOrientationPortrait’ in bundle ‘com.bitbull.flappingbird’.”
ERROR ITMS-90475: “Invalid Bundle. iPad Multitasking support requires launch story board in bundle ‘com.bitbull.flappingbird’.”

To fix this add a setting’UIRequiresFullScreen’ to your project’s info.plist file and set it to ‘YES’.

Hopefully you should now be good to go and if you got this far without topping yourself – well done! It’s not exactly the most straightforward process in the world!

Playing MP3 Background Music In MonoGame Windows

The process of porting ‘Attack Of Giant Jumping Man‘ to Windows Desktop has been generally painless. One of the things that has given me the most issues though has been getting MP3 background music to play correctly. For some reason the WindowsGL version of MonoGame doesn’t support MP3 files as XNA Song objects to play via MediaPlayer.Play().The solution, as usual with these kind of issues, is to go native. Unfortunately just doing something as simple as playing an MP3 file on Windows is much more convoluted than would seem necessary if you want to avoid including additional dependencies (DirectX, Windows Media Player etc) into your project.

So, here’s some code that will play MP3 files without the need for additional dependencies by hooking into the winmm.dll. Import your MP3 resources using the MonoGame pipeline tool and just set to ‘copy’ with no pre-processing. Code could probably do with tidying up a bit but it works!

#region Using Statements
using System;
using System.Text;
using System.Runtime.InteropServices;
using Microsoft.Xna.Framework;
using Microsoft.Xna.Framework.Audio;
using Microsoft.Xna.Framework.Media;
using Microsoft.Xna.Framework.Input;
#endregion

namespace com.bitbull.meat.platform.windows
{
    public class WinmmMp3MediaType
    {
        [DllImport("winmm.dll")]
        private static extern long mciSendString(string lpstrCommand, StringBuilder lpstrReturnString, int uReturnLength, int hwndCallback);
        private string filename;
        private string command;
// Expects a name like 'yourfile' WITHOUT an extension (just for consistency with Content.Load)
// Expects files to be stored at root of Content directory with no pre-processing 
        internal WinmmMp3MediaType(string name)
        {
            filename = "Content/" + name + ".mp3";
        }

        internal override void Play(int loopcount, float volume)
        {
            StringBuilder retvalue = new StringBuilder();
// You need to stop and close and currently playing files otherwise it doesn't work properly
            command = "stop Mp3File";
            mciSendString(command, null, 0, 0);
            command = "close Mp3File";
            mciSendString(command, null, 0, 0);
            command = "open " + "\"" + filename + "\"" + " type MPEGVideo alias Mp3File";
            mciSendString(command, retvalue, 0, 0);
// I've commented out the code for setting the volume as it's specific to the way I do things but basically this command expects an integer between 0 (min volume) and 1000 (max volume) 
            // float master_volume = MEAT.Platform.MediaInterface.MusicVolume / 100.0f;
            // mciSendString(string.Concat("setaudio Mp3File left volume to ", (int)volume*master_volume*1000), null, 0, 0);
            // mciSendString(string.Concat("setaudio Mp3File right volume to ", (int)volume*master_volume * 1000), null, 0, 0);
            command = "play Mp3File";
            if ( loopcount<=0 )
            {
                command += " REPEAT";
            }
            mciSendString(command, retvalue, 0, 0);
        }

        internal override void Stop()
        {
            command = "stop Mp3File";
            mciSendString(command, null, 0, 0);
            command = "close Mp3File";
            mciSendString(command, null, 0, 0);
        }
    }
}

Going Full Screen In MonoGame Windows

One of the things that caused me some issues when porting ‘Attack Of Giant Jumping Man‘ to Windows was getting the game to run full screen at the correct resolution.

Unfortunately the MonoGame calls that should return the dimensions of the primary display don’t seem to work correctly on all hardware. My system was OK (a Mac Pro running Windows 8 via VMWare Fusion) but on @PVBroadz Surface Pro 3 MonoGame would, for some reason, insist the primary display was only 720 pixels wide.

My solution to this was to use native calls to return the width and height of the primary display, the following in my Game.Initialize() method seems to work just fine when placed after baseInitialize()…

GraphicsDeviceManager.PreferredBackBufferWidth = System.Windows.Forms.Screen.PrimaryScreen.Bounds.Width;
GraphicsDeviceManager.PreferredBackBufferHeight = System.Windows.Forms.Screen.PrimaryScreen.Bounds.Height;
GraphicsDeviceManager.IsFullScreen = true;
GraphicsDeviceManager.ApplyChanges();

…don’t forget to add a reference to the System.Windows.Forms dll!

Creating Bindable Properties in Xamarin.Forms

UPDATE: This post, popular as it has been, is somewhat outdated now. I’ve written an updated version that is more ‘cut and paste’ friendly and removes the references to generic types (which are now deprecated in Xamarin.Forms) here.

Something you’re bound to run into sooner or later when developing with Xamarin.Forms is the issue of how to make a property bindable. Fortunately it’s pretty easy to do – though I found it hard to find a simple example online that worked both for setting the property programmatically and via xaml.

So, without further ado here’s an example of a bindable ‘Foobar’ property that can be set both programmatically and via xaml. Just copy/paste this into your own code whilst changing the relevant bits and you should be fine…

Note: ‘YourClass’ should be replaced by the type name of the class that holds the property. References to ‘bool’ should (obviously) replaced by the type of property you are declaring. The ‘false’ value that is passed to the BindableProperty.Create() method refers to the default value for the property and should be replace by something meaningful.

public static readonly BindableProperty FoobarProperty=BindableProperty.Create( p => p.Foobar, false );

public bool Foobar
{
	get 
	{ 
		return (bool)GetValue(FoobarProperty); 
	}
	set 
	{
		SetValue(FoobarProperty, value); 
	}
}

private void UpdateFoobar()
{
	// Do whatever you need to do when the property 
	// has been set here. By the time this method is
	// called Foobar will already hold the updated value
	// so if you need to reference the old value you will
	// need to store it in a class variable
}

protected override void OnPropertyChanged(string propertyName)
{
	base.OnPropertyChanged(propertyName);

	switch( propertyName )
	{
		case "Foobar":
			UpdateFoobar();
			break;
	}
}

Hopefully that’s been helpful – now why not take a brief break from work to watch our trailer for ‘Attack Of Giant Jumping Man’…


Attack of Giant Jumping Man

Unhelpful Exceptions In Xamarin.Forms

if you’re wondering why it’s been so quiet around here recently it’s because I’ve had my head down working on a contract project using Xamarin Forms – as well as trying to get #superjp finished. Life is busy. Too busy.

Anyway, Xamarin Forms is pretty cool once you get the hang of it – but to start with things were very painful. Documentation is sparse and often wrong, then when crashes happen exceptions are usually thrown deep within the bowels of some auto-generated code leaving you with little or no idea what the issue is. And that’s when you get an exception at all – often the exceptions are unhelpfully caught and just ‘glossed over’, leaving you with absolutely no idea why your code isn’t executing.

So I thought I’d jot down a few posts covering issues I’ve run up against which may prevent someone from tearing their hair out quite as much as I had to over the first couple of weeks – first up is weird crashes and unhelpful exceptions.

1. Autofac.Core.DependencyResolutionException

An exception was thrown while invoking the constructor ‘Void .ctor(IAuthenticationService)’ on type ‘MenuService’. Argument cannot be null.

This exception often appears after changing properties in the XAML. It appears to be the result of a bug in Xamarin Forms and was always thrown in the same place in our code. Simply building/running again stopped the exception from appearing. Annoying to say the least – but once you’ve added a comment to remind you it’s not your fault you learn to live with it.

2. Error: The type `SomeType’ already contains a definition for `someProperty’
This is a compile time rather than a runtime error and is caused by creating properties in your ‘code behind’ class that have the same names as controls in the associated XAML (x:Name=”someProperty”). Always give your custom properties/class variables unique names – Xamarin.Forms seems to use the ‘x:Name’ property for variable names in generated code and this is what causes the conflicts.

A similar issue can cause errors at runtime if you have a named control (x:Name=”SomeProperty”) that conflicts with a type name in the same namespace or one of the imported namespaces. It’s probably good practice to define your own naming convention for XAML controls so that you are sure they don’t conflict with any properties, types or variables in any accessible namespace.

3. Xamarin.Forms.Xaml.XamlParseException: Property Content is null or is not IEnumerable
This one is probably obvious to those with prior experience of XAML but to noobs like me it wasn’t and caused much weeping and gnashing of teeth. You can’t have more than one Layout at the top level of a ContentPage (or ScrollView, whatever). This makes sense when you think about it (how would it know how to layout the Layouts) but the exception doesn’t give much clue as to what’s going on so can lead to confusion.

4. Xamarin.Forms.Xaml.XamlParseException: No Property of name ‘Foobar’ found
Assuming the class to which you’re referring actually has a property of name ‘Foobar’ (or whatever) then the most likely cause of this is that the property is not bindable. I’ve given a simple example of how to make a property bindable here. Most of the properties within the Xamarin.Forms classes have already been made bindable but if you do run into one that’s not you can most likely create a subclass that contains a bindable version of the property you want to access (just set the appropriate property in the base class).

This error can also be caused by duplicate name issues as describe in 2 above.

5. The name InitializeComponent does not exist within the current context
If you’re running Forms as a shared project with iOS as the target the most likely reason for this error is that you don’t have ‘Use MSBuild Build Engine’ checked under Project Options->Build->General.

Another cause of this error can be mistakenly not having your XAML class definition ( x:Class=”Foo.Bar”) matching the class definition in your ‘code behind’ class. I made this mistake a number of times when using copy/paste to set up XAML files.

I may add more here later…

Subterranean Nightmare – How Jet Set Willy Destroyed My Life

It’s 1984, and I am a spotty fourteen-year-old obsessed by Mathew Smith’s latest bizarre creation – Jet Set Willy. Jet Set Willy is the sequel to Manic Miner, at that point one of the most popular ZX Spectrum titles to date – and amazingly it’s a quantum leap ahead of its predecessor. There are something like 60 levels in the game, all of which can be explored in a nonlinear manner. It’s surreal, atmospheric, and feels absolutely vast.

But – there’s a problem. The original release of the game is impossible to complete due to a number of bugs. One room in particular – The Banyan Tree – has what’s obviously supposed to be an exit blocked by an impassable block. My brother and I have some limited experience tinkering around with ZX Spectrum machine code so I make a fateful decision – if you can’t beat the game fairly, hack it!

Fortunately you don’t need to be Mathew Broderick in ‘War Games‘ to figure out the Jet Set Willy level format and even a certified numpty such as myself can manage it. I start by writing a BASIC program to PEEK at every address in RAM and print out the associated ASCII character (we’d done something similar in an unsuccessful attempt to win £25k for completing Domark’s text-based adventure ‘Eureka‘*).

Scanning through the memory it becomes clear where the level data is stored as you can read the names of the various rooms. From there it’s a matter of POKE-ing randomly in the nearby memory space – then launching the game, seeing how the level has changed, and trying to figure out what exactly you’ve just done. Wait five minutes for the game to reload from cassette tape, rinse and repeat.

I can’t remember exactly how the level data was formatted but it was pretty straightforward. Each byte (I think) described four ‘blocks’ (two bits for each), with each block being either solid, passable, deadly or empty. After this was a bunch of data containing the graphics for the various blocks, the level name, and parameters describing how the enemies moved. Once I’d figured this out the excitement of designing my own levels quickly overtook the desire to complete the original game – I forgot about The Banyan Tree and wrote a level editor in BASIC aiming to somehow publish my own version.

That project eventually became ‘Subterranean Nightmare‘ – an unashamed Jet Set Willy rip-off that was published by US Gold / Americana Software in 1986. It was written from the ground up but used pretty-much the same level format as Jet Set Willy with a few additions. It contained a few bugs, a lot of bad puns, half-decent graphics and terrible sound. Critical reception was mixed and I received the princely sum of £6,000.00 for it which was a fortune back then and still a significant chunk of change now. From then on, barring a brief flirtation with graphic design and digital marketing in the 90s, it’s been game dev all the way.

There were a couple of (at the time) innovative features in Subterranean Nightmare which I’m still pleased with in retrospect. Firstly, you could save your progress to cassette tape (a feature I’d never seen on any arcade/platform type game at the time), and secondly there were a series of barriers which blocked further progress until a percentage of the game had been completed. It seems ridiculous now but games at that time were usually either completely open (like Jet Set Willy) or completely linear (like Manic Miner) – I wasn’t aware of any title that utilised this combined approach.

One supposedly ‘original’ (i.e. not completely lifted from Jet Set Willy) feature that a few reviews picked up on was the fact that you can jump on some of the enemy’s heads in order to catch a lift to higher platforms. I’m ashamed (ok, not that ashamed) to say that this was actually a particularly pernicious bug that I couldn’t be bothered to fix – deeming it much easier to write it in as a ‘feature’ instead.

Looking on the map you’ll see a level that contains a bunch of large numbers. This was my home phone number at the time and was only supposed to be accessible after completing the entire game. Unfortunately a combination of two bugs made that room just about accessible form the first screen (with some fiddling about) so my parents were inundated with phone calls from geeky kids thinking they’d won some kind of prize. Most of the calls were from Scotland for some reason.

Now, if you’ll forgive, me I must go perform a quirkafleeg…

Subterranean Nightmare On World Of Spectrum
With reviews, maps, emulator images etc

Subterranean Nightmare Walkthrough On YouTube
I can’t believe someone actually did this!

You can read about the next Spectrum game I created, ‘Skateboard Joust’, here.

* The £25k Eureka prize was eventually won, legitimately, by Mathew Woodley – a kid in my year at school.

cornflower
Jet Set Willy’s Bathroom – Where It All Started

floppy
The Banyan Tree – Bringer Of Much Pain & Sorrow

floppy
Bad Puns And Adolescent Search For An Arty Signature

floppy
The First Screen – The Barrier On The Left Disappears When You Collect Your First Object

subterranean-nightmare-map
The Full Subterranean Nightmare Map


Not Even I Would Have The Patience For This…


Thirty Years Later – It All Led To this(!)

Windows Phone Development On A Mac With MonoGame

This week I have been porting ‘Toss The Floppy Frog’ (my first Android and iOS title with MonoGame) to Windows Phone 8 – and it has been painful. Very painful. So painful that I though I’d write a simple step-by-step guide to the process of porting iOS and Android MonoGame titles to Windows Phone. Hopefully this will ease the pain for others.

Part of the suffering has, no doubt, been due to the fact that I am a complete Windows noob. I have been developing on a Mac since around 1995 and have barely touched a Windows machine since then – I even wrote my own JavaME emulator (running on J2SE) so I could do JavaME development on a Mac! Windows, and all its terminologies and conventions, is very much uncharted territory for me.

The largest chunk of pain has, though, been due to what are in my opinion three key deficiencies in the Windows Phone implementation of MonoGame. These are…

1. The Project Templates Are Broken
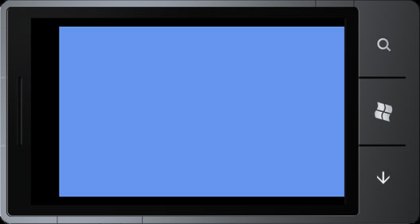
The MonoGame project templates provided with the 3.2 install don’t work with Visual Studio 2013 (which is the latest version at the time of writing). I don’t know about previous versions. The basic template doesn’t launch the game correctly and doesn’t get to the ‘cornflower blue’ screen we so long for. No errors are given, it just doesn’t work. This issue caused me around half a day of tearing hair out before I found a post on the MonoGame forum that gave a solution (see the ‘step by step’ guide below). If these templates could be fixed I’m sure it would save a lot of developers a lot of grief and avoid casting MonoGame in an unnecessarily bad light.

2. The Content Pipeline Requirement Sucks
I understand the requirement for a content pipeline, really I do. Optimising your assets for use on different platforms is a great idea, but it should be exactly that – part of the optimisation process, NOT a requirement for getting a basic game up and running. The fact that ‘raw’ image and sound assets can’t be loaded in the Windows Phone implementation of MonoGame but can in the Android and iOS versions kind of makes a mockery of the whole ‘Write once, play anywhere’ mantra. Many developers (myself included) will have games that run perfectly fine without the need for content pipeline optimisations and the requirement to use one is just an unnecessary barrier to ‘getting stuff done’.

3. The Content Pipeline Itself Sucks
I couldn’t get any of the MonoGame content projects to load correctly in Visual Studio 2013 and I was unable to find any information online as to how to get the Monogame content tools to work correctly without these. the MonoGame content tools were completely useless to me. Fortunately someone on the MonoGame forums pointed me to an open-source XNB compiler that I was able to edit (ie hack) to convert all my assets to XNB (see the ‘step by step’ guide). That’s at least a day of pain right there. Frankly, if I hadn’t have been pointed to this tool I probably would have given up (and I hardly ever give up).

Now I have the greatest respect for the MonoGame project and team – they have given and continue to give their time for free to provide an awesome product for the IndieDev community. The criticisms above are given in the hope that these areas of MonoGame will be improved which will lead to more developers adopting the platform and more fun/revenue for all of us. Hopefully they’ll be taken in that spirit.

And, once you’ve got past the pain, there is one gigantic plus to all of this, and that is…

100% code re-use!!

Yes, you read that right. Once I was able to iron out a couple of quirks I was able to get 100% resuse of my game code across Android, iOS and Windows Phone. That’s pretty much the holy grail of cross-platform coding and an extremely big upside! The only platform specific code is in the app-launcher stubs and about three lines in my image loader. Nice.

So, without further ado, on to the step by step guide to porting iOS/Android MonoGame titles to Windows Phone using a Mac…

1. Prepare Your Code For Windows Phone
If, like me, you’re more familiar with a Mac and Xamarin Studio than Windows/Visual Studio it’s easiest to get this out of the way before you even touch Windows. Here are the issues I came across:

System.Collections.Hashtable is not available on Windows Phone.

References to this class can be replaced easily by references to:

System.Collections.Generic.Dictionary<Object><Object>

Note that there is a slight ‘gotcha’ here in that Hashtable will return null when trying to retrieve a value for a key that doesn’t exist whereas Dictionary will throw an exception. Your code may need to be altered to account for this.

System.Collections.ArrayList is not available on Windows Phone.

References to this class can be replaced easily by references to:

System.Collections.Generic.List<Object>

System.Runtime.Remoting package is not available on Windows Phone.

If you use this package you will have to work around this somehow. I was using it for dynamic class instantiation and could quite easily replace it by hard-coded calls to instantiate the relevant classes.

The following MonoGame properties return incorrect values on Windows Phone:

GraphicsDeviceManager.PreferredBackBufferWidth
GraphicsDeviceManager.PreferredBackBufferHeight

GraphicsDevice.DisplayMode.Width
GraphicsDevice.DisplayMode.Hight

If you are using any of these to get display width/height the following alternative seems to work:

GraphicsDevice.Viewport.Bounds.Width
GraphicsDevice.Viewport.Bounds.Height

Texture2D.FromStream() is not implemented in MonoGame for Windows Phone.

Bummer. If you are using this (as I was) you will have to work around it. I caught the System.NotImplemented exception and loaded the relevant asset(s) using the content manager instead. I really hope this gets implemented soon as it’s an important function.

Assets are loaded without the file suffix.

On Android/iOS you will probably be using something this:

Content.Load(“myimage.png”)

to load assets which will have to change to:

Content.Load(“myimage”)

on Windows Phone. Ideally write code that catches the exception and tries the alternative method if the first attempt fails.

2. Install Some Kind Of Virtual Machine
You probably want either VMWare Fusion or Parallels. I used Fusion which seems OK though it took quite a bit of farting around to get the ‘shared folder’ feature (which allows you to access files on your ‘host’ mac from the ‘guest’ PC) to work.

3. Set Up The Virtual Machine And Install Windows
Set up an x64 virtual machine and install a 64bit version of Windows otherwise the Windows Phone emulators won’t work. I’m still running a 32bit version of Windows which means I have been unable to launch the emulators so far – I’ve been using an actual device for testing. I believe it must also be the ‘pro’ version of Windows in order for the emulators to work.

4. Install Visual Studio 2013 Twice(!)
From here. You want both the ‘Windows’ version (for Windows Phone) and the ‘Windows Desktop’ version (for the content pipeline stuff). Fortunately both will reside happily side-by-side (unlike my children).

5. Install MonoGame 3.2
From here. May well have been updated since this was written.

6. Install XNA
You will need this for the content pipeline stuff. Follow the instructions and use the PowerShell script kindly provided here.

7. Install Windows Media Player
If it’s not there already – some versions of Windows install it by default, some don’t. You’ll need it for audio processing in the content pipeline and it can be downloaded from here.

8. Set Up A New MonoGame Solution
Launch Visual Studio for Windows and choose the ‘MonoGame Windows Phone’ project template uncder ‘Visual C#’ templates. If it’s not there you need to check MonoGame has installed properly. Call the project something sensible (e.g. the name of your app) and save it anywhere.

9. Update The MonoGame Packages
This is necessary to fix the broken MonoGame template issue and must be done with a solution open in Visual Studio. Launch the NuGet console under Tools->NuGet Package Manager->Package Manager Console and type in the following:

PM: Install-Package MonoGame

This will update the template. It asks if you want to overwrite a few files – click ‘yes’ to each one but ‘no’ to ‘Game1.cs’ as this file will have been altered to reference your app’s namespace.

10. Check For ‘Cornflower Blue’
Now you have done this you should be able to build/run the project and get our old friend the ‘cornflower blue’ screen on your chosen emulator or device. Well done! It took me about a day to get to this point!

11. Import Your Source Code
Having wasted a lot of time trying to get Visual Studio to reference files on my Mac I came to the conclusion that this is impossible. Unlike Xamarin Studio, Visual Studio won’t let you import files as links – they have to reside within the project directory, so the simple-but-far-from-ideal solution is to copy the files from your Mac to the host PC and import. Note that you can ‘copy’ directories from within Windows Explorer and ‘paste’ into Visual Studio which I found the easiest way to import a lot of files at once.

12. Compile Your Source
Hopefully if you followed the suggestions in step one your source just compiles at this point. If not you will have to fix any errors, unfortunately I can’t tell you what these might be as I covered everything I came across in step 1!

13. Convert Your Content To XNB
This should be possible just by using the MonoGame tools but I never succeeded. I had to download an open-source XNB compiler tool from here, open in Visual Studio Desktop, then compile and run to convert my files. It works OK, but the tool only appears to allow you to add one file at a time. Thankfully it was fairly easy for me to modify the code to allow all files in a directory to be added and I’ve included my edited source here. The tool successfully converted PNG, JPG and WAV files for me. If you get an error regarding a missing .dll whilst trying to covert audio you probably need to install Windows Media Player as described in step 7. Whilst MP3 files seem to convert OK I haven’t managed to get them playing correctly yet but I will update this post if and when I do.

14. Import Your XNB Files Into Visual Studio
These go in the ‘Content’ directory exactly as you’d have them organised for iOS or Android. Once imported select the files and under ‘properties’ set ‘build action’ to ‘content’ and ‘copy to output directory’ to ‘copy always’.

15. Change The Template Code To Start Your Game
In Visual Studio find the GamePage.xaml file. Click the little disclosure triangle next to it to reveal GamePage.xaml.cs. Edit this file to replace references to the Game1 with references to your Game class.

16. Run Your App
Congratulations, assuming you followed the tips in stage 1 about loading assets your app should now run on device or emulator. It took me almost three days to get to this point!

I hope this guide is of help to someone – any suggestions for improvement just let me know!

Toss The Floppy Frog – Feels Like My Life’s Work


cornflower
Not Since Yves Klein Has A Blue Square Seemed This Exciting

floppy
At Last – Frog Tossing On Windows

iOS Rate App URL Links In MonoGame / Xamarin

So, in the aim of trying to get a simple ‘rate me’ type link working in Floppy Frog I’ve been trawling the Internet and wading through the usual plethora of conflicting information. It really is surprising that such a simple and necessary piece of functionality isn’t better documented or supported by Apple.

Anyway, the best I could come up with is the following (using info from various sources). This should work in pretty much every version of iOS. Seems Apple did something weird with iOS 7 which they then fixed with iOS 7.1.

The ‘id’ parameter is the numeric app id which you can get from iTunes connect. The ‘Purple Software’ parameter in the second URL, whilst it looks like something that should be changed, is actually some weird Apple thing that needs to stay there. Bizarre, I know.

Note that this will NOT work in the iOS Simulator. Hope this helps someone…

using MonoTouch.Foundation;
using MonoTouch.UIKit;

public void RateApp( string id )
{
	String url;
	float iOSVersion = float.Parse(UIDevice.CurrentDevice.SystemVersion);

	if (iOSVersion >= 7.0f && iOSVersion < 7.1f)
	{
		url = "itms-apps://itunes.apple.com/app/id"+id;
	}
	else
	{
		url = "itms-apps://itunes.apple.com/WebObjects/MZStore.woa/wa/viewContentsUserReviews?type=Purple+Software&id="+id;
	}
	UIApplication.SharedApplication.OpenUrl(new NSUrl(url));
}

And just for some gratuitous search engine bait, here’s some cool Flappy Bird Videos.