Category Archives: Marketing

Jetboard Joust Devlog #105 – Trailer Trash pt 2

Please wishlist Jetboard Joust on Steam here.

Well, the trailer’s finally done – thank God! As with the last instalment I ran into a few issues along the way and got distracted by (necessary) bugfixes. Here’s a brief summary of how things panned out…

1. Oh, Bugger!
The thing about doing a trailer is that it makes you capture and scrutinize a shedload of gameplay footage AND deviate from your ‘learned’ methods of playing your own game. The consequence of both these things is that you uncover new bugs.

I ran into a few new bugs when working on this section of the trailer, most of them related to trying out different weapon types on the bosses. The most significant of these was that there were major deficiencies in the raycasting algorithm I was using to work out damage caused by explosive weapons. Turned out I was only calculating collisions based on axis-aligned bounding boxes (fine for smaller enemies, not fine for the more complex outlines of some bosses). So I had to redo the algorithm to work properly with convex polygons.

There were also issues in the way damage was distributed via ‘proxies’ (e.g. different parts of the same boss) which had to be looked at and problems with the ‘particle storm‘ weapon which were very fiddly to debug.

2. Enemies and Weapons
The next twenty-ish second chunk of the trailer aims to give an overview of the variety of weapons and enemies in the game. I split the into eight 2.5ish edits, taking the timings from the ‘Enter The Gungeon’ gameplay trailer which seemed to pace the edits about as fast as you can get whilst still making sense of what’s going on. Managed to squeeze a brief glimpse of the weapon upgrade process in here too – I wanted to convey visually that there’s upgrade paths available for the weapons.

The edits were made by grabbing a shedload of footage and then whittling it down to the ‘best’ short segment. This was a time-consuming process. I set up levels artificially so I was only dealing with one enemy at a time – ‘real’ gameplay footage proved too confusing as there was just too much going on most of the time.

3. Bosses
The next twenty seconds or so provide a five second ‘reveal’ of the first four bosses. That’s only enough time to sneak a look at the first attack phase of each but I think that’s enough – I’m bit worried about giving too much away as it is. As with the previous stage, I had to grab a ton of footage and then whittle it down to the ‘best’ edits. I also had to bear in mind the transitions between the edits whilst grabbing the footage, i.e. make sure the player was positioned onscreen at a point where a smooth transition would be possible so the viewer’s eye never has to make a disconcerting jump. I found this was particularly important when dealing with very short cuts. I had to re-shoot a couple of edits in both this section and the last in order to get these transitions smooth.

4. Out With A Bang
Initially this section was simply a glimpse at the final boss fight but I felt that just cutting to titles after this seemed rather lame. Consequently I worked on a more ‘scripted’ take where the player flies over the final boss and then takes it out with an R.P.G. It’s not possible to do this in the actual game (the fight has about five stages) but it acts as a significantly more punchy ending to the trailer.

I had to do multiple takes of this to get it right as I needed to fly over the boss, shoot it accurately, and then position the player accurately in the middle of the screen all without doing anything visually unappealing like crash into the edges of the screen or flipping left/right too much. there were plenty of bloopers – including some where I fired the R.P.G. in completely the wrong direction.

5. Outro Titles
I ended up doing these in code and positioning them over the last section in After Effects using chromakeying. Initially I thought I’d animate them in After Effects but I just found this far too fiddly. Fortunately I was able to use the in-game logo ‘entrance’ without having to change anything much so it was mainly about animating the subheadings with the release date etc. I like the way the smoke is still dissipating in the background as the titles appear!

6. Back To The Beginning
Lastly, I went back to the start of the trailer. I was every-so-slightly over 1:30 seconds so I edited the initial titles down a bit. As some people had commented that the player appeared to come ‘out of nowhere’ a bit (I kind of agreed with this) I tried panning across to the player before going back to the alien babies/abductions. This seemed to work. I also made the player blink in this cut to bring him to life a bit (done in After Effects) and added ‘abduction’ and ‘mutation’ text with pans and zooms with the rest of the action.

Now I think we’re finally there. Next task – Steam page and assets!

Dev Time: 8 days
Total Dev Time: approx 300 days

previous | next

The Final Trailer In All Its Glory

mockup_3x
Raycasting Now Works Correctly With Convex Collision Polygons

mockup_3x
Fixing ‘Proxy’ Collision Detection Bugs

Jetboard Joust Devlog #104 – Trailer Trash pt 1

Decided to split this devlog in two as making a videogame trailer is a fairly long process, particularly when you don’t know what the hell you’re doing! Plus there’s been a couple of other things that needed attending to before I felt I could really progress as I’d like.

1. Audio FX
Firstly I had to do some more work on the in-game audio. There were a number of actions I felt required fx that didn’t have any (some pretty important such as unlocking weapons and worlds) and a couple I wasn’t happy with. I spent a couple of days on this. There are now around 270 individual effects files in the game, and that’s not including background music and loops! I think the audio is a pretty distinctive part of the game due to the fact it’s all produced from scratch on analogue gear – no stock samples here, folks!

2. Performance Optimisations
Secondly, as I was recording a bunch of action footage I began to notice frame-rate drop at a few points where there was really intense action on screen. This was exclusively at places where enemies that release a bunch of ‘offspring’ are destroyed by a weapon that kills the enemy and all it’s offspring in one fell swoop (e.g. the jetboard attack). The resulting explosion-and-bonus-fest was just a bit too much.

So, I worked on some optimisations for the above. This included adding object pooling for every object that’s generated when an enemy is destroyed, combining multiple smaller explosions and/or smoke clouds that are very close together (and instantiated in the same frame) into one larger one, and pre-caching of the terrain elements that pickups might hit as they fall (rather than calculating this every frame). I’ve also let some offspring ‘escape’ in the above scenario as I didn’t like it when absolutely everything got destroyed. I no longer see any frame rate drop now, even when there’s a shitload of fireworks going on, and I’m running a Mac from 2008!

3. Start The Trailer
Before starting the trailer I read through a number of very helpful blogs on the subject by Kert Gartner and M. Joshua. Here is a particularly good one.

3.1 Choose The Tools
One of the most useful practical tips I picked up from these was a pointer to an app called Screenflow that will grab 1080 game footage at 60fps even on my ancient Mac. I’ve been through a bunch of these screen capture applications (Snapz Pro, Capto, Screenium) but Screenflow is the only one that will do this. Capto is cheap and neat (this is what I’ve used for most of my animated GIFs and devlog posts) but will sometimes compress really heavily for no apparent reason, Screenium is almost as good as Screenflow (and cheaper), will let you record a set area AND remembers this rea (really useful) but it still compresses a bit even at the highest settings (plus I found it’s editing tools a tad clumsy and prone to crashing). For the purposes of recording gameplay footage for trailers Screenflow definitely comes out tops.

3.2 Intro
Probably the hardest part of the trailer to get right is the first 15 seconds. You don’t want to lose the user’s interest and you have to attempt to communicate the core mechanics of your game in as short a time as possible (without being overly didactic). I’m still not sure I’m 100% there but I think what I’ve come up with does a reasonable job of communicating abductions, mutations, the jetboard attack and the general carnage of the game in that timeframe. To get this footage I used a combination of scripted events (i.e. faking things through coding) and playing through a set sequence over and over again until I managed to one-shot all the enemies in a way that looked effortless and ‘readable’ enough.

3.3 Shock & Awe
After this initial intro section comes just under another 15 seconds of what I’m referring to as ‘shock and awe’. This is a high-octane segment that focusses mainly on the destruction wrought by the jetboard attack but also features a couple of other weapons. This is all ‘real’ gameplay footage, I just recorded a load of stuff to get a variety of enemies and palettes. I deliberately try and move the action from one side of the screen to the other here.

3.4 Breathing Space
Lastly comes just over 10 seconds of ‘breathing space’. A longer cut in which we see the destruction of a boss, the opening of a treasure chamber and the discovery of a new weapon. This section has a certain amount of scripting (reducing the bosses health and getting rid of some onscreen distractions) but is largely the result of playthrough after playthrough to get things looking slick and pulled off in as short a time as possible.

I’ve tried to keep the player’s position onscreen consistent between cuts so that the viewer’s eyes can easily track what’s going on. I’m also zooming/panning across the action where appropriate in order to avoid ‘dead’ areas of screenspace and create variety. I thought this might be overly distracting but it doesn’t seem to be.

So now we have just under 45 seconds of trailer done which is approximately half of it. Next step, around 20 seconds on enemies and weapons, 20 seconds on bosses, and a five second closer!

Dev Time: 10 days (inc 2 days audio and 2.5 days performance optimisations)
Total Dev Time: approx 292 days

previous | next

Animated GIFs of Gameplay Footage for Twitter on Mac OSX

I’ve been asked how I do this a few times on Twitter so thought I’d write a post about it. Haven’t done a ‘tutorial’ style post in a while. My bad.

Posting animated GIF images on Twitter is a very good way to get retweets and likes and build awareness of your game, but if you’re using a Mac there aren’t that many tools out there for the job. Most people seem to use GifCam on PC but there doesn’t seem to be a Mac equivalent.

In a nutshell I use Apple’s Quicktime Player to screen capture followed by a process in Photoshop to crop and convert to animated GIF. I tried a bunch of different tools and processes before deciding on this as by far the best way.

Make your GIFs 506 pixels wide by less than or equal to 506 pixels tall so that Twitter doesn’t resize them and make them all blurry (especially important for pixel art).

Photoshop has a stupid 500 frame limit for animated GIFs but you’ll probably hit Twitter’s 5mb size limit before this becomes a problem. It is, unfortunately, a problem sometimes though.

So, in detail…

1. Decide On An Emulator
I’m developing cross platform with Xamarin/MonoGame and have found by far the best emulator to use is GenyMotion for the Android platform. I use this for general development and for all screen capture. The iOS emulators are way to slow and grabbing video direct from iOS device is also too flakey and produces too many compression artefacts. The GenyMotion emulator is very fast and can be reliably run at 1:1 ration for pixel art – only downside is that the 1:1 function requires a ‘paid for’ licence.

Xamarin’s free Android Player is pretty good but at the time of writing there are bugs in the handling of key events which means I can’t use it for my purposes.

2. Capture
I use Apple’s Quicktime Player for this. I was using Snapz Pro but it only seems to capture up to 30fps. To screen capture from Quicktime Player just click ‘done’ on the first dialog that pops up then go to File->New Screen Recording. From there it’s self-explanatory.

3. Edit
This step is optional as you can do it in Photoshop. I find it much easier to crop the video to the section I want using Apple’s outdated but incredibly useful QuickTime Player 7 Pro. This is another paid app I’m afraid but it really makes the process a lot less painful.

4. Import Into Photoshop
Open your video in Photoshop and crop it to size. You can ‘scale up’ later when saving as a GIF so you could crop to 50% of your final size (or even less). This can look good for pixel art. Then I do the following procedure…

5. Adjust Colour Profile
– Edit->Assign Profile->Generic RGB Profile
Your mileage may vary on this but I find that screen captures from Quicktime always seem too dark when importing into Photoshop. This alleviates that issue to an extent.

6. Create Layers
Open the animation window (Window->Animation) and in the menu at the top rioght of the animation window select ‘Flatten Frames Into Layers’. This may take some time. Once this is done select the original movie layer (it will be the bottom layer in the layers palette) and delete it.

7. Create Frames
Back to the animation window menu now – this time select ‘Make Frames From Layers’.

8. Save As GIF
You are now ready to export your animation. For some reason I’ve found that Photoshop often does something weird with the first frame, like it’s assigned a different colour profile or something. You can check this by moving the timeline marker in the animation window and seeing if everything looks OK. If it doesn’t you can more the ‘start’ marker to just beyond the problem frame (you can also use these start/end markers to crop the timeline if you didn’t edit your video as described in step 3).

Use ‘Save For Web’ to export and you will have to mess around with the colour settings to get your animation under 5mb. Even if your image contains no transparency keep ‘transparency’ checked as without it file size jumps up dramatically (maybe photoshop uses this to only update areas of each frame that change). Note that you can scale up your image at this point – be sure to select ‘Nearest Neighbour’ scaling for pixel art.

I’ve found that the ‘loop’ setting keeps getting set back to ‘once’ when other parameters are changed so make this the last thing that you do. Changing colour options and the like can result in a lengthy ‘beachball of death’ depending on the size of your GIF so when you see this don’t panic just wait it out.

It’s easy to set up a Photoshop Action to cover steps 5 through 7.

That’s it. Any questions or comments please contact me here or on Twitter.

Retry – Why Both Apple And Rovio ‘Could Try Harder’.

Everyone knows how difficult it is for indie devs without a massive marketing budget to get visibility on the AppStore, which is why the minimal amount of curation Apple does is so important for indies – and why it’s doubly depressing to see the “Editor’s Choice” section of the AppStore so often filled with big-budget, big-name titles. Do consumers really need to have yet another ‘Saga’ or ‘Angry Birds’ game rammed down their throats when King/Rovio’s overflowing marketing coffers are quite capable of doing that without Apple’s help? Whenever I take a look at the “Editor’s Choice” section the vast majority of it seems to consist of titles that have already been pushed at me through some other marketing channel (usually Facebook or in-app advertising).

Anyway, self-righteous moaning aside, I thought I’d give Rovio’s ‘Retry’ (which was #1 in the “Editor’s Choice” section a few days ago) a spin and see if there was enough quality there to justify it’s placement. Despite my sour-grapes cynicism and automatic distrust of big-budget apps I’m working on a pixel-art type project at the moment and the game art intrigued me if nothing else.

What a major disappointment. ‘Retry’ is a game so woefully lacking in imagination that it makes ‘Custer’s Revenge’ look like ‘Ocarina Of Time’. My real problem with ‘Retry’ though is not the paucity of original ideas within it, or that it’s a bad game (it’s not actually that bad if I’m honest). My issue with it is that the boardroom level thinking that must have given birth to it is so obvious that Rovio may as well have transcribed the meeting minutes in the App Description:

“Fellow Directors, I feel we’ve reached about level 7 of the game they call ‘Shit Creek’. People are getting bored of ‘Angry Birds’ and the shareholders are getting twitchy about all these layoffs. We need another Big Idea – something to prove “Angry Birds” wasn’t just a fluke. You all get paid enormous salaries – what have you got for me?”

“Well, that ‘Flappy Bird’ game was huge and it was made by just the one guy. Imagine if we took a concept that braindead and then threw shedloads of money at it!”

“Good idea – we wouldn’t even need shedloads of money. These mofos love that retro pixel-art shit and it’s a piece of piss to churn that stuff out. We can even copy some old SNES games!”

“Sold! We can’t use a bird though, too hard to animate. What about a plane – they’re easy to draw?”

“Genius idea – we could call it ‘Big Budget Flappy Plane’!!”

“We’re so cool. No wonder this company is worth biilions. See you soon Rovi-bros!”

I do like the art though, the art is pretty cool. And it’s not really nicked from a SNES title – it’s simple, chunky, colourful and general very appealing. And the plane control is quite nice when you get the hang of it. The main problem (and it’s a big problem) with the gameplay is that the sprite sizes and game physics are so designed that you simply can’t see far enough in front of you to react effectively to what’s coming up, making success more about memorising the levels than anything else. I guess if that’s your thing though….

Did I mention I have a ‘Flappy Bird’ clone coming out? Guilty as charged, your honour.

retry1
Retry – aka Big Budget Flappy Plane

retry2
Budget Wouldn’t Stretch To A Crash Anim Though

custer
Custer’s Revenge – Don’t Even Go There


Floppy Frog – NOT a Flappy Bird Clone, Honest

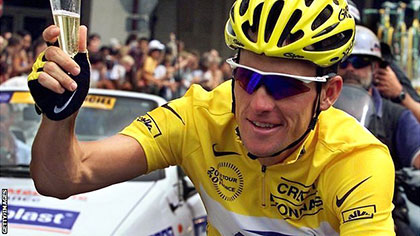
Why Being An iOS Developer Makes Me Feel Like Lance Armstrong

Is it because working at the cutting edge of a fast-changing new technology is a non-stop thrill ride? Like the nail-biting descent off the Col De Tourmalet, you never know quite what’s round the next corner. Just grit your teeth, hang on, and try and enjoy the ride?

Er, nope.

Then is it because you have to commit and be in there for the long haul? Plan ahead, cope with the many ups and downs, don’t let the smaller setbacks knock you off your game. Stay focussed and know that if you’ve put the groundwork in and prepared well and can hang in there your determination and persistence will win out?

Wrong again.

It’s because Lance Armstrong was a cheat.

And the excuse that he gave for cheating was pretty much that everyone else was cheating. Taking performance-enhancing drugs, though he knew it was wrong, was simply his way of being able to compete on a level playing-field – a necessary evil. The system was flawed and he was just trying to make the best of it.

Apple’s iOS AppStore is similarly flawed. It’s pretty much impossible for a small, independent developer with no marketing budget to speak of to cut through the noise – whatever the quality of their work. And as so many are resorting to the ‘performance enhancing drugs’ of app title/keyword manipulation, fake reviews, bought reviews/downloads and the like, it puts a huge amount of pressure on others to do the same just to level the playing field. The result is a dysfunctional, ugly mess that works neither for the developer nor the consumer. One huge, cancerous, cannibalistic peleton with ‘Flappy Bird’ and a few others at the head and everyone else desperately scrapping amongst themselves to get in their slipstream. Eventually it’ll disappear up its own arse like those cartoons of a snake eating its own tail.

So far I’ve drawn the line at buying reviews or downloads – when things sink to that level you may as well be spamming Viagra for a living. I have changed the title of ‘Floppy Frog‘ though. It’s now ‘Toss The Floppy Frog And Bounce Around The Spikey Lilly Pads‘. Ridiculous, I know. And I may have a ‘Flappy Bird‘ clone launching soon (just because I had it hanging around of course). If I was a pro athlete they’d probably have banned me already.

Give us a break, Apple. The drugs don’t work.


Lance Armstrong – The Bastards Must Have Spiked My Champagne!


Floppy Frog – Now Officially A Tosser

Creating App Promo/Demo Videos With Adobe Premiere

One of the things I’ve had to do with Floppy Frog is create a promo video for uploading to YouTube. I’ve made many promo videos for my JavaME apps and games but these were very simple and I’ve never had to do them in a YouTube-friendly format.

I used to use iMovie for promo videos until Apple changed it from a very simple, flexible and useable tool into the pile of arcane, prescriptive and utterly useless garbage that it is now. For the last few years I’ve been using Apple’s Quicktime 7 pro which, ironically, was much more suited to task than the ‘new and improved (read ‘ruined’) iMovie.

But, Quicktime 7 Pro was not going to cut it (pun intended) for this task so I decided to try Adobe Premiere. Overall I found it a good application for the task in hand though getting the settings right was somewhat time consuming, I’ll therefore detail the process here.


1. Capturing The Video

I thought initially that I’d capture video from the iOS Simulator. Bad idea. It runs much too slowly. Next attempt was to run Floppy Frog on the iPad and capture using Reflector as an Airplay Receiver. Again, bad idea. Frame rate was OK but quality wasn’t up to scratch.

Third attempt was to run the Android version of Floppy Frog using the GenyMotion emulator and capture using the excellent Snapz Pro. Success! GenyMotion runs Floppy Frog just as fast as it would on device and Snapz Pro is a highly configurable and useable screen capture tool. It even captured the audio without a hitch. Had to purchase the full version of GenyMotion to get rid of the ‘free for personal use’ message but I don’t begrudge them that as it’s a fantastic piece of software at a reasonable price.

GenyMotion also has the benefit of being able to configure device display height/width so you can set up a virtual device that’s ideal for the video format you want to capture. In this case my video will run on YouTube at HD 1280*720. Floppy Frog is a portrait game so I wanted a device size that wouldn’t look too ‘squished’ within the HD landscape frame, therefore I set up a virtual device of 600*720 and captured at this size at 30fps which is the frame rate at which the game runs.


2. Import The Video Into Premiere

You’d expect this bit to be easy, and it is easy to simply import the captured video into Premiere. Where I ran into difficulties was that Premiere organises all video into a ‘sequence’ and setting up a ‘sequence’ that matched my video capture settings seemed impossible. All I could do was choose from a series of preset sequences and changing the preset sequence settings was not allowed for some reason. The key issue was that none of the preset sequences ran at 30fps, only 29.97 fps and when Premiere attempted to match my 30fps captured video to the 29.97 sequence settings I was getting horrible interlacing effects.

The solution was to start the Premiere project with any old sequence settings, import the captured video, then select the captured video and choose ‘New Sequence From Clip’. This creates a new sequence matching the captured video settings exactly. Only issue was my video was captured at 600*720 and I wanted a video running at 1280*720! Solution: capture a few seconds of random 1280*720 30fps video using Snapz Pro, import into Premiere, then create the sequence from this. The 600*720 video can now be dragged into this new sequence no problem and the 1280*720 capture can be deleted from the project.

Next issue (which most people probably won’t run into) is that my sound hardware runs at a 48khz sample rate whereas my video was captured at a 48khz sample rate. For some reason Premiere seems pretty flaky about converting between the two (whatever the project Audio settings) so I had to make sure my captured video was saved with the audio running at a 48khz sample rate.

3. Export The Video For YouTube

Once the video is comped together in Premiere it has to be exported at high-quality for uploaded to YouTube. I got and tweaked ‘export media’ settings from a YouTube tutorial and they might be slightly overkill quality-wise but I’ve added screenshots on the right…

4. Sit Back And Watch The Traffic Roll In

Or maybe not. But here’s the finished product anyway…

premiere_vid_youtube
Adobe Premiere YouTube Video Export Media Settings.

premiere_audio_youtube
Adobe Premiere YouTube Audio Export Media Settings.